Easy Image Uploads with Firebase Storage and React Dropzone (Part 1)

This blog post is the first of a two-part series. This first part will setup Firebase and react-dropzone. The second part will make react-dropzone more useful and then connect it to a Firebase instance.
Building a file uploader from scratch is a time-consuming challenge. Adding some cool, and user-appreciated features like drag and drop functionality will quickly make the process more complex. There are a couple packages that make the process of implementing a file uploader in your react project a breeze.
There is no point in building everything from scratch. Basically, don't reinvent the wheel.
Prefer to see the code? Check the part-1 branch.
Before you start you can see the code in action.
Firebase Cloud Storage
It is easy to learn, easy to implement, but most of all it is free (at least until your project really starts to grow). Aside from that, it is robust and offers secure SDKs for various platforms including web, iOS and Android.
In a nutshell it works by allowing developers to upload and download files straight from the client. The files are stored in a Google Cloud Storage bucket. Firebase handles settings up all the Google Cloud Platform project and initial configuration.
React Dropzone
The fullest and most feature-rich library for dragging and dropping files. It is simple to use and HTLM5-compliant. This package really simplifies the whole file uploading process with a lot of key features such as:
- provides file metadata
- customizable styles
- adds minimal size to your project
As you use react-dropzone in your own projects you will grow to appreciate it more and more.
Let's Get Started
Firebase Setup
First you need to setup a Firebase project. The process is straight forward thanks to Firebase's superb developer experience.
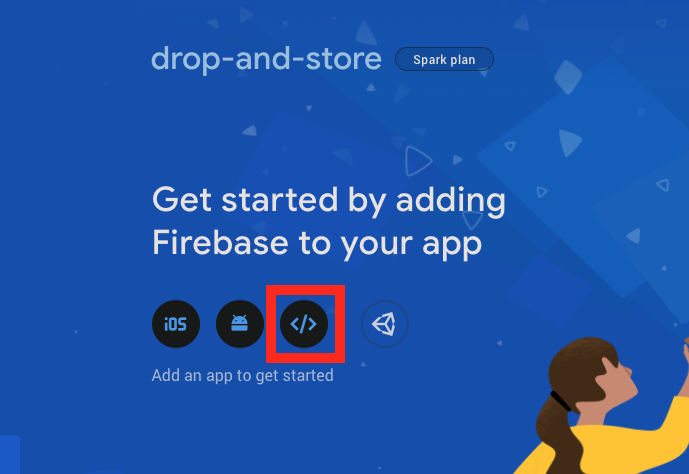
Go do the Firebase console and click Add project. Enter a cool name like "drop-and-store". Follow the prompts and Firebase will do its thing. Once your project is ready click on the Web app icon to create your a web app tied to your project.

Once again follow the prompts, including giving your web app a nickname. At some point you will be shown the config for project. It will look something like this:
const firebaseConfig = {
  apiKey: 'AIzaSyAsZ0*ee_aanJPKFg4rAAAdEVK1pb7rPh9',
  authDomain: 'drop-and-store.firebaseapp.com',
  databaseURL: 'https://drop-and-store.firebaseio.com',
  projectId: 'drop-and-store',
  storageBucket: 'drop-and-store.appspot.com',
  messagingSenderId: '504715539226',
  appId: '1:504715539226:web:941749ee0ac773838abcb3',
  measurementId: 'G-55DDAAXDZ2',
}
Take note of these configuration values. You will need them again in a couple of minutes.
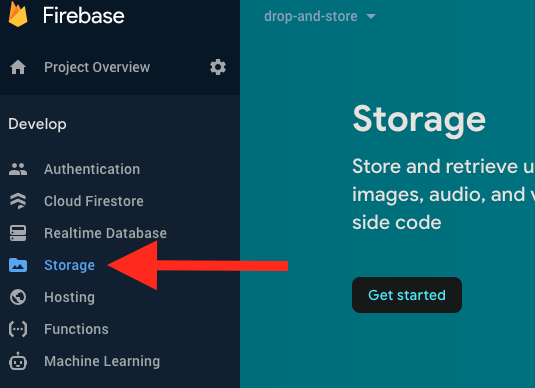
Lastly, in the Firebase console we need to navigate the Storage section. If you see a "Get Started" button, click it and go through the prompts to create your storage bucket.

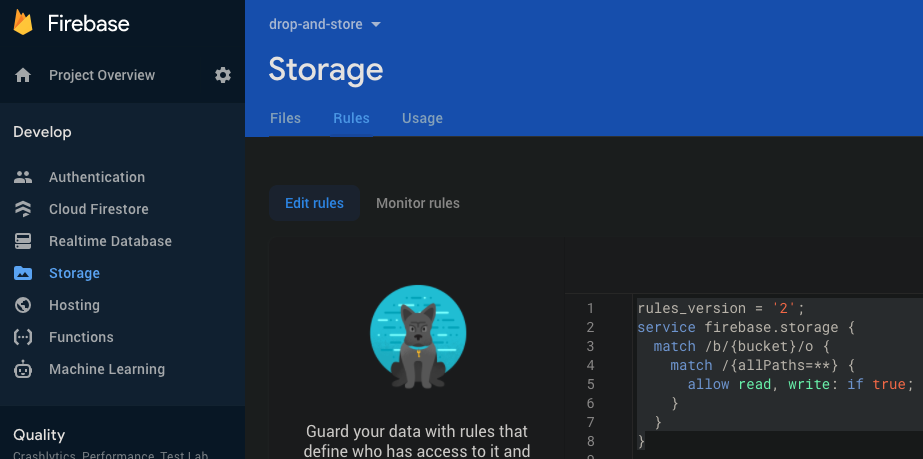
Once you have assigned a bucket then navigate to the Rules tab of the Storage section. Here update the rules as follows:

That will allow us to read and write to the storage bucket without any authentication. Typically, you would not leave this completely open in a real world project, but for demo purposes that is okay.
rules_version = '2';
service firebase.storage {
  match /b/{bucket}/o {
    match /{allPaths=**} {
      allow read, write: if true;
    }
  }
}
React Project Setup
Create a new react project using create-react-app. Then install react-dropzone and firebase.
npx create-react-app drop-and-store
cd drop-and-store
yarn add react-dropzone @firebase/app @firebase/storage
For the purpose of this tutorial that is all we need to do to get our project set up. Wasn't that painless?
Let's Build It
Get Firebase Ready
We need to give our project access to our Firebase project and web app. We can do so by creating a firebase.js file in the src directory of our project. Create the file and paste this code into it. Remember to use your Firebase project's configuration values.
import firebase from '@firebase/app'
import '@firebase/storage'

// Replace these with your own :)
const firebaseConfig = {
  apiKey: 'AIzaSyAsZ0*ee_aanJPKFg4rAAAdEVK1pb7rPh9',
  authDomain: 'drop-and-store.firebaseapp.com',
  databaseURL: 'https://drop-and-store.firebaseio.com',
  projectId: 'drop-and-store',
  storageBucket: 'drop-and-store.appspot.com',
  messagingSenderId: '504715539226',
  appId: '1:504715539226:web:941749ee0ac773838abcb3',
  measurementId: 'G-55DDAAXDZ2',
}

// Make sure it hasn't already been initialized
if (!firebase.apps?.length) {
  firebase.initializeApp(firebaseConfig)
}

export default firebase
This code basically instructs our react project to connect to your Firebase project. We initialize the Firebase app within our react project, then then export it for use in other files.
Onto the Components
Most of our component code will live in App.js, so let's begin by replacing the entire file with the below code.
import React, { useCallback } from 'react'
import { useDropzone } from 'react-dropzone'

const containerStyle = {
  background: '#dadada',
  width: 250,
  height: 250,
  display: 'flex',
  justifyContent: 'center',
  alignItems: 'center',
  padding: 50,
  textAlign: 'center',
}

function App() {
  const onDrop = useCallback((acceptedFiles) => {
    // Do something with the files
  }, [])
  const { getRootProps, getInputProps, isDragActive } = useDropzone({ onDrop })

  return (
    <div style={containerStyle} {...getRootProps()}>
      <input {...getInputProps()} />
      {isDragActive ? <p>Drop the files here ...</p> : <p>Drag 'n' drop some files here, or click to select files</p>}
    </div>
  )
}

export default App
The App.js component implements the useCallback hook to quickly setup a dropzone by giving you some objects to pass into the wrapper div and input elements. This leaves us with a very rudimentary dropzone.
Final Thoughts
You can hover over the dropzone while dragging a file to see the text change, but that is about it. Although it has been fairly trivial to get started, it is not something you can impress your friends with at this point.
In the next (and final) blog post of this two-part series we will add some functionality to preview and upload a dropped image.