Quick API with React Query and Hasura

Once in a while I start using a new framework or package and get that feeling that I know I have found a new member of my favorite tech stack. While working on my latest project, I got that feeling when I found React Query. I quickly discovered why it has 13.3k ⭐'s on GitHub and why it's quickly gaining traction.
React Query has joined the ranks among my favorite way to build an API, Hasura. Which in it's own right, is an excellent choice to quickly setup a robust API with built-in authorization and GraphQL API calls for your database.
Let's take a look at how simple it is to setup an API using these two powerhouse tools.
Don't want to read? Check the repository.
Fast Setup
Create a Hasura Project
Hasura makes this super easy with Hasura Cloud. First, you need to create an account if you don't already have one. You have some different login options available.

Once that is done you can click on the Create a project button.

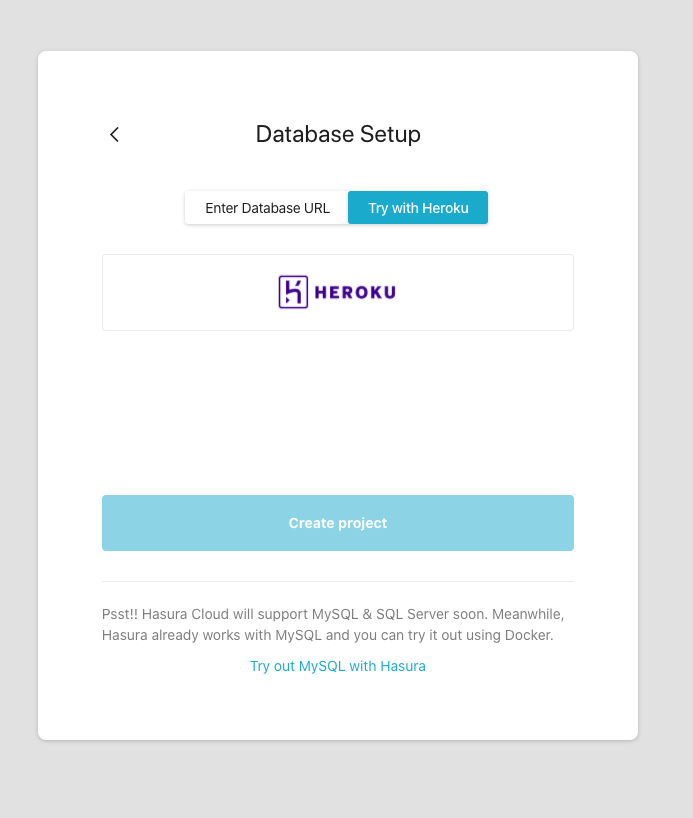
You will be prompted for some database connection data, however the easiest (and free) approach is by selecting Try with Heroku (another favorite part of my stack). Click the big Heroku button and watch the magic go to work.
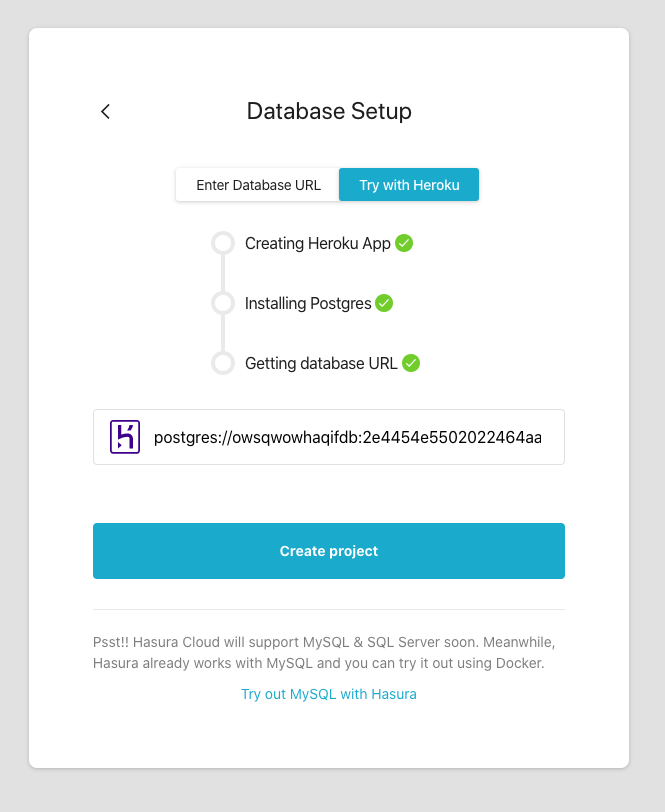
After everything is provisioned click the Create project button and voila! - Hasura did all the hard setup work for you.
There will now be a big blue Launch Console button on the top right of the window. This will lead you to the console where you will make all your database changes. Any changes made in the console will trigger your GraphQL API to be updated, reflecting the changes you made. Neat!
Create a Database Table
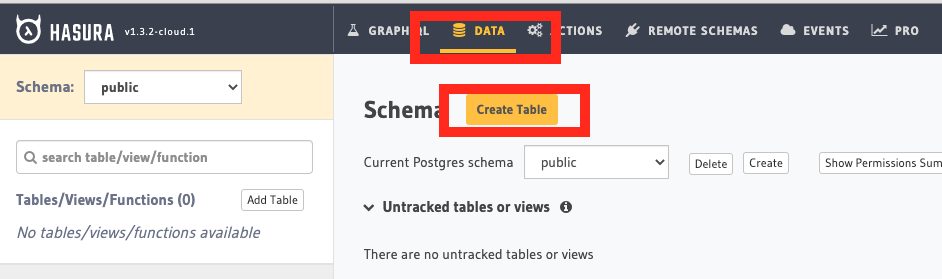
We can quickly setup a database table by heading to the Data tab and clicking the yellow Create Table button.
You can setup the table as you wish, but I am going to use some cool JavaScript projects and links to their GitHub repositories. Here you will enter the table specific properties including table name, column information, primary keys, etc. We are keeping it simply, all the setup you need is in the screenshot below.
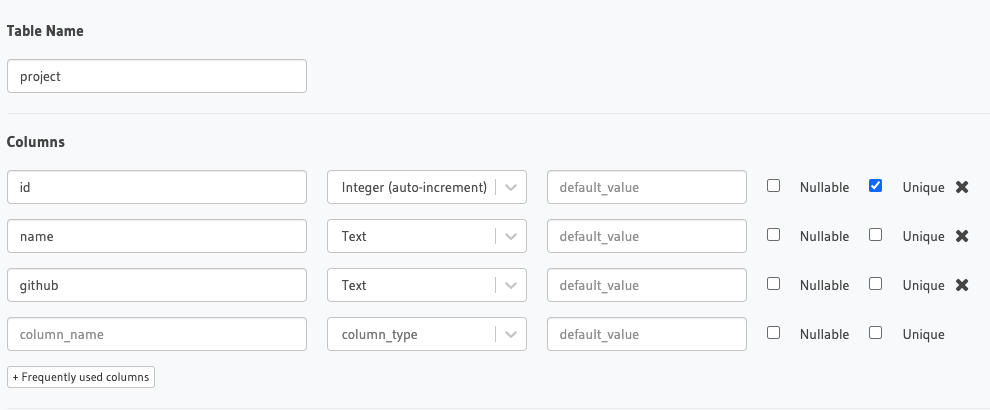
Once done click the Add Table button at the bottom of the screen.
Add Some Data
Clicking on the Insert Row tab will take you to a screen where you can, well, insert a row. Type in some data and click Save to insert a row. Then type in some different data and click Insert Again to insert another row.
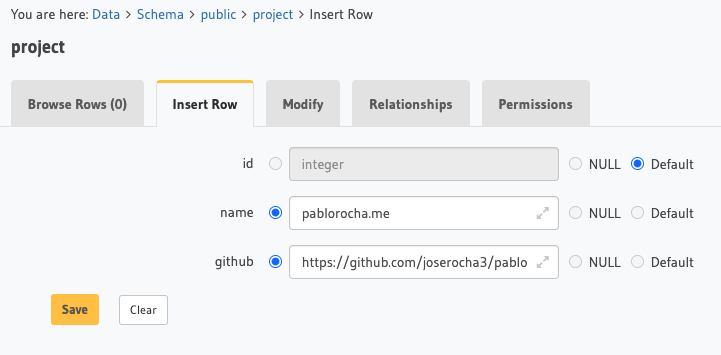
Here is the data I am using:
pablorocha.me              https://github.com/joserocha3/pablorocha.me
React Query                https://github.com/tannerlinsley/react-query
Hasura GraphQL Engine      https://github.com/hasura/graphql-engine/
use-places-autocomplete    https://github.com/wellyshen/use-places-autocomplete
That is it. Within minutes we provisioned a database and have a GraphQL API layered over our database. Poke around the Hasura Console to find some more goodies.
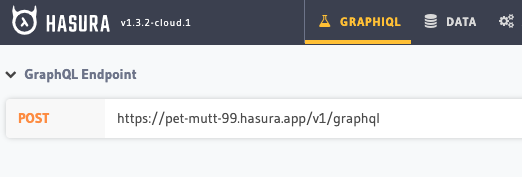
Take Note
Before heading to the next section, be sure to go to the GRAPHIQL tab and take note of your GraphQL Endpoint. That will be used in your React app to connect to your Hasura instance.
Start Coding
We will create a React project that will consume the GraphQL API Hasura is providing for us.
Create a new react project using create-react-app. Then install react-query and graphqurl.
npx create-react-app react-query-with-hasura-ftw
cd react-query-with-hasura-ftw
yarn add react-query graphqurl
Render the List
Replace the entire App.js file with the below code.
import React from 'react'
import { ReactQueryCacheProvider, useQuery } from 'react-query'
import { query } from 'graphqurl'

const getProjects = async () => {
  const results = await query({
    query: 'query { project { id name github } }',
    endpoint: 'https://pet-mutt-99.hasura.app/v1/graphql',
  })

  return results.data.project
}

const App = () => {
  return (
    <ReactQueryCacheProvider>
      <Projects />
    </ReactQueryCacheProvider>
  )
}

const Projects = () => {
  const projectsQuery = useQuery('project', getProjects)

  return (
    <div>
      <h2>Some Projects</h2>
      {projectsQuery?.data?.map((project) => (
        <p>
          <a href={project.github} target="_blank" rel="noopener noreferrer">
            <code>{project.name}</code>
          </a>
        </p>
      ))}
    </div>
  )
}

export default App
After that simply run yarn start and you will see the project in action.


Code Analysis
Let's look at individual code blocks to understand how the list is being retrieved and rendered.
The starting point is the App component. We have to wrap our entire app in a ReactQueryCacheProvider component. This component places React Query's cache into the app's context, which enables it to be acccessed anywhere in the component tree.
const App = () => {
  return (
    <ReactQueryCacheProvider>
      <Projects />
    </ReactQueryCacheProvider>
  )
}
From there we can step down one level into the Projects component. This is where we implement useQuery. For this simple example that method takes two parameters:
- query key - a unique key to indentify a query
- query function - a function to resolve the data for our component to render
useQuery returns the projectsQuery variable. That contains information about the query state such as whether it is loading or contains data. We are interested in data because that will contain all the records from our database.
const Projects = () => {
  const projectsQuery = useQuery('project', getProjects)

  return (
    <div>
      <h2>Some Projects</h2>
      {projectsQuery?.data?.map((project) => (
        <p>
          <a href={project.github} target="_blank" rel="noopener noreferrer">
            <code>{project.name}</code>
          </a>
        </p>
      ))}
    </div>
  )
}
The final block of code is our getProjects method. Which is being used as our query function. This method makes a call to our GraphQL API and parses out the data we want to return to our Projects component.
const getProjects = async () => {
  const results = await query({
    query: 'query { project { id name github } }',
    endpoint: 'https://pet-mutt-99.hasura.app/v1/graphql',
  })

  return results.data.project
}
Final Thoughts
Done and done! React Query and Hasura make setting a up a new project an extremely painless process. There are a lot more aspects to cover (such as mutations and authentication), we look into those in future blog posts.